Baby Boy’s Striped Nursery Reveal

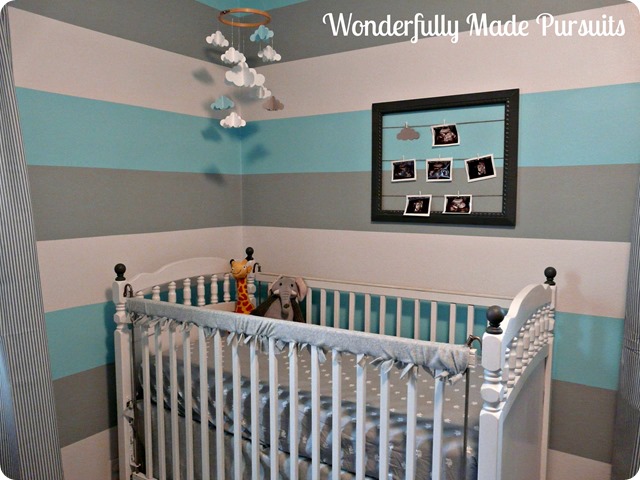
I am so excited to finally show you the finished nursery for baby boy! I just added the finishing touches a little while ago and now I just love to go in there and try to picture how our little man will use the space.

Here are my previous posts about the painted stripes, cloud mobile, elephant lamp, chevron dresser, and chevron lamp.

And now, a whole lotta pictures…

nursery update (2)

Ellery generously gave up her crib a month or so ago so we could get it ready for
baby B. She is already such a sweet big sister.

nursery update (7)

I spray painted this frame and had Mike help me staple some jute to the back to hang pictures on. In the future I think I’ll print out some instagram pics to hang there, but for now we will use the only pictures of little man that we have.

nursery update (10)

Here is the other side of the nursery.

nursery update (6)

The amazing growth chart that our sweet friends made us.

nursery update (3)

The “gallery wall.” I used some leftover fabric (including the bags that held the crib sheets) in embroidery hoops to bring some of the patterns together. Then it still seemed a little empty so I added the clouds left over from the mobile.

nursery update (1)

This embroidery was given to Mike from his great grandparents. I simply covered the glass and spray painted the frame and I love having it as an heirloom in our house.

nursery update (17)

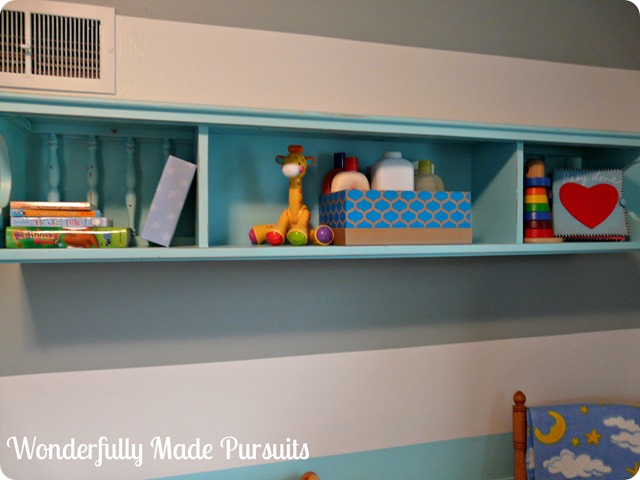
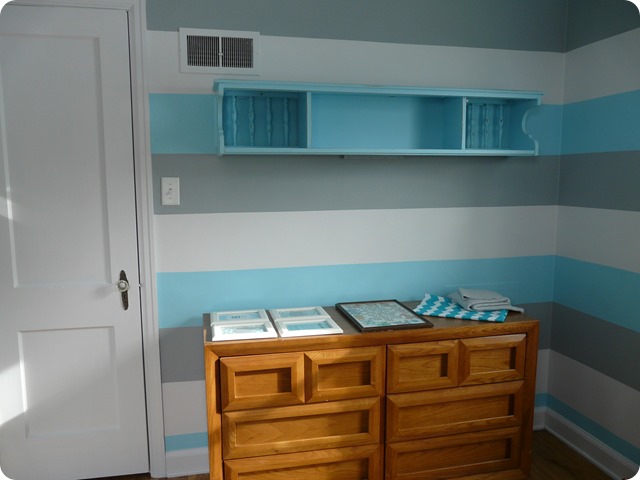
And here is the other wall. Mike made the glider rocker and I repurposed the shelf from an old headboard.

nursery update (14)

I already love having this extra shelf for storage and easy access to things needed at the changing table.

nursery update (15)

I think all is ready for baby Benjamin.

nursery update (8)

The rug and curtains are from IKEA.
Let me know if you have any questions about anything else in the room.

 nursery update (2)

Okay, baby boy, we’re ready for you. You can come ANY time now.

Gray and Chevron Dresser

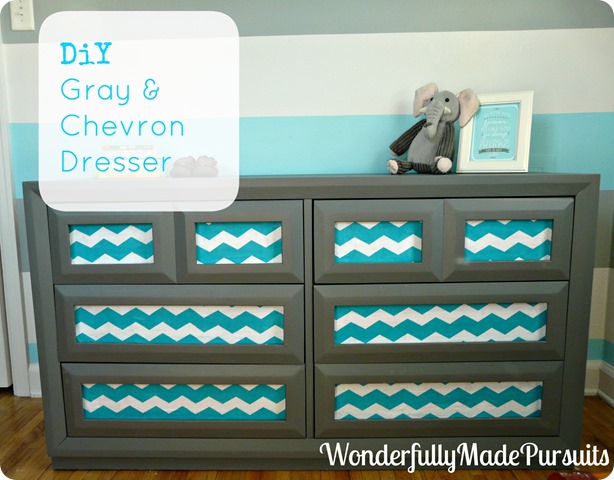
We have have been working on several projects for baby B’s room.  A little while ago I asked for your thoughts on how to redo his dresser and I got a lot of awesome feedback—thank you! I decided to go with a dark gray paint (we had it on hand from other parts of our house) and line the fronts of the dresser with the chevron fabric I had picked up on clearance.

gray dresser pic

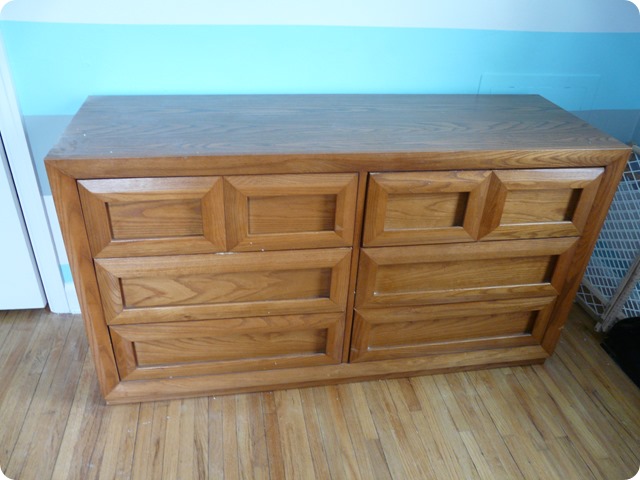
Here it is in all it’s before glory.
(P.S. we were given this dresser for FREE by some friends when they were moving and didn’t want to lug it with them. So that makes the cost for this whole project pretty amazing. Also, thank you friends!)

gray and chevron dresser (2)

The top was laminate, but the sides and front were all wood, so I gave the whole thing a light sanding using an orbital sander and an oscillating tool with a sanding head for the details (like inside the drawer fronts).

gray and chevron dresser (4)

Then I primed everything.
And yes, I did all of this inside because do you KNOW how cold it has been this winter?? Thankfully old sheets do a great job of catching any drips.

gray and chevron dresser (6)

I went back and made sure to give an extra coat of white to the recessed parts of the drawers so that if anything were to show through the fabric it would just be a solid white.

gray and chevron dresser (5)

Then I gave the dresser frame and the drawers (except the recessed parts) two coats of the dark gray, but apparently didn’t take pictures of that part of the process. We have this color in parts of living and dining rooms and I love how DIFFERENT the color looks in a different setting. I think the lightness of the white, gray, and blue stripes bring out a much bluer gray on the dresser.

Next, came the tricky part. I created two templates that fit inside the drawers so I would know what size to cut my fabric. When I first started tracing I was frustrated because I couldn’t seem to get a straight line with the fabric. Then I realized that the chevron pattern did NOT go straight across, but rather slanted a little. So, I just cut straight lines and let the pattern do its thing.

gray and chevron dresser (7)

I also didn’t take pictures of me fitting the fabric inside the drawers, because, let’s face it, I was fitting the fabric inside the drawers. This was definitely the hardest (and most frustrating) part of the whole process. I used an even layer of ModPodge and started from the middle of the drawer out to try to avoid bubbles and creases as much as possible.

Let me be honest with you, it’s not perfect. I think ModPodge is as frustrating as it is helpful, because I never used it for a project that I didn’t have some bubbles in. Despite working quickly and using a credit card to smooth it all out. But, overall I love how it turned out and I don’t think you notice the imperfections unless you look for them. So I, for one, decided just to choose not to look for them.

I also covered the fabric with a layer of ModPodge to seal it and keep the fabric from fraying or coming up. Ready to see it??

Gray Dresser Collage

And some “after” glory.

gray dresser pic


gray dresser pic2

Stay tuned for more projects for our little man’s space.
Thanks for being here.

Baby Boy’s Striped Nursery Update

Yesterday, I showed how we repainted the stripes in baby b’s room.
Check that out here.

Now I want to show you a few more pictures and some projects I’ve done.

b's room before and after (6)

Since there still are multiple colors on the walls, I want to try to use a lot of the same colors to tie everything together.

Somewhere in the room we want to use our amazing growth chart given to us by my bestie. She hand makes them with her hubby. She’d be glad to hook you up if you live in or near NY.
(Shameless plug over)

b's room before and after (7)

I made this jungle animal garland by cutting out scrapbook paper with my Silhouette and stringing it with mini clothespins on some gray yarn. I would like to use the jungle animal shapes somewhere else in the room as well, but I’m still figure out the specifics. At the very least there will be elephants because I think this is an elephant sort of room.

b's room before and after (8)

The toddler bed will of course go in Ellery’s room and we will move the crib in here. But for now Elle enjoys playing on it and has already gotten very good at getting on and off of it. We figured it was a good first step for transitioning from crib to bed.

b's room before and after (9)

And THIS is the amazing rocking elephant that Mike’s dad made Ellery for Christmas. We could not love it more.

b's room before and after (10)

He built it AND painted it himself.

b's room before and after (11)

In fact, we love it so much that Mike and I would like to try to make some of these puppies ourselves if anyone would be interested in the end product. He has the plans for either a rocking horse or rocking elephant and we could paint custom colors. Any interested parties should contact me. 😉

b's room before and after (12)

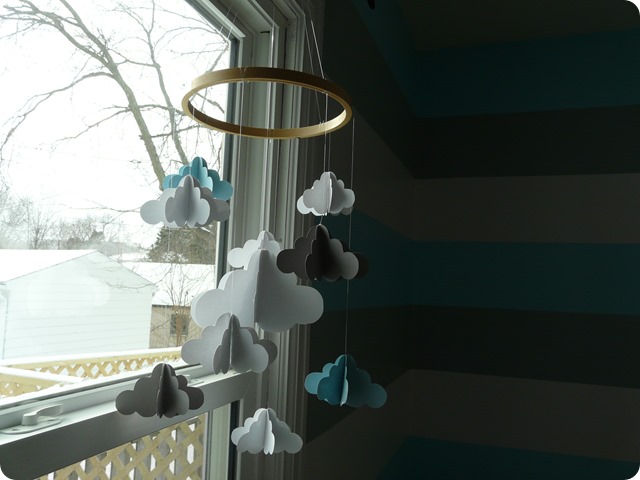
This is the cloud mobile that I made from this tutorial. I used my own cloud shape and cut it out on the Silhouette to save loads of time.

b's room before and after (14)

I used mostly white clouds, but threw in some blue and gray ones as well.

b's room before and after (13)

The headboard shelf still works very well in this room and I’m excited for the extra storage it will provide. This is also the dresser that we will be using for out little man, but I’m struggling with what exactly to do with it.

b's room before and after (16)

That’s where you come in.

I like the contrast of the wood, but this dresser has seen better days and has some scratches and things. I would love to do something like this.

(source)
If you’re going to pin this one, please do so from the original site.

This whole nursery is darling, you should check it out. She used chevron fabric on the front recessed parts of the drawers.

b's room before and after (17)

I think if I did paint it, I would love to highlight those recessed portions, and I have the chevron fabric below that I think would work wonderfully. The question is do I paint it white? Or would it look better with the same light gray of the walls or perhaps a darker gray? I need your thoughts and opinions!!!

(The picture on the left is a cross stitch that the hubby’s great grandparents gave to him when he was born. What an amazing thing to be able to pass down.)

b's room before and after (18)

This is also some artwork that will hang on the wall somewhere. See, I told you, more elephants. And more clouds, they are kind of an underlying theme as well. And, if you’re really observant you’ll notice what we’re thinking of naming baby boy. Calling him baby b stands for baby BOY and Benjamin.

b's room before and after (1)

The name print can be found here and is FREE and customizable.
The “I’ll love you forever” print is also free and can be found here.

Thanks for being here! And please, puh-lease, let me know what you think about the dresser. I need feedback.

Linked up to..
Love of Family and Home

Baby Boy’s Striped Nursery

I alluded to this in my last post, but we have already done quite a bit in the nursery for baby boy (see previous craft room) and have other fun plans in the works.

But first, a little back story for those that don’t know…

We have two bedrooms on our main floor (our bedroom is the upstairs), one is Ellery’s room and the other used to be my craft room. When we were making paint choices for the room I wanted to have a pattern of three horizontal stripes in bright colors. I ended up choosing three VERY bright colors based partially on colors we already had.

The end result? A crazy bright room with stripes that took FOREVER and a day to do. But I loved how they looked and got so much inspiration from creating in such a cheery room.

craftroom Collage

When we found out in December that we were having a boy this time we were faced with some decisions. Did we switch Ellery to the craft room and put baby b in her room which was blue? Seemed reasonable, but I didn’t know how keen a 1 1/2 year old would be on all of a sudden switching rooms. She was already going to be going through a lot of transitions, I didn’t want to complicate that if I didn’t have to. PLUS I was ready for a change from the stripes anyway. But the stripes took soooo much time and energy to do that I couldn’t bear the thought of just painting over them. And if we did, what color?

I won’t take you through all of the ins and outs of our decision, but what we ultimately decided was to keep the blue stripe, paint the pink stripe the same gray as our living room/dining room, and paint the yellow stripe the same white that we’ve used on all the molding/doors in our house. Consequently we needed to repaint the molding in that room anyway, so it was a bit easier to do it all at once.

b room Collage

I la la love how fresh and calm it feels in there now. It is perfect for our little man.

Let’s walk through a bit of the process, shall we?
Here’s what we started with again.

b's room before (2) 
The lines were all there on the wall already, which meant no measuring this time which saved a HUGE chunk of time. I taped off the pink stripes first, making sure to leave a little bit of the blue showing so that there would be no pink hiding underneath the tape. Then I painted the blue over the tape (on just the top of the pink stripe) so that if there was any seepage it would be blue and not gray to ensure crisp lines. Then I primed with some white on top of all of the pink. Finally, I painted gray over that. And it only took 2 coats!

Already a huge difference without the pink.

b's room before and after (3)

Then I repeated the steps for painting over the yellow. Tape, paint over tape with the blue AND gray, prime, and paint with white. Again, we also painted the baseboards, doors, and molding the same white since they were in need of touch-ups. OH! And the closet! The closet was the original sage green that the room AND THE CEILING were painted when we moved in. We (by “we” I mean the hubs, he took one for the team and painted the closet for me since it was too much to be in a small space with fumes like that) painted the closet white and called it good.

b's room before and after (4)

The lines came out so crisp and clean it was absolutely worth the little bit of extra work painting over the tape.

b's room before and after (5)

It feels like a completely different room.

b room Collage

I want to show you a few more pictures and a few projects I’ve been working on for this room, but I fear that if I add all that to one post this will be way too long. So I’m going to make you wait till tomorrow. That includes the super adorable rocking elephant you see. Another of Ellery’s wonderful homemade Christmas presents.

What do you think about the new colors? Hubby admitted that the previous colors were not really his favorite, but that’s not super surprising considering he’s a man. haha. Plus, that just makes him a champ for letting me do my own thing even when he didn’t like it and helped A TON the with painting those crazy stripes in the first place.

In case you’re wondering, my craft room got moved to the basement where it is now my craft-space-in-progress. The whole basement is in progress, really, so when we have new walls and floor and all that I will show you pictures. For now it is a usable (albeit cold and not quite as inspirational) space where I can store all my stuff.

Also, if you were wondering about paint colors the blue is Atlantic Dawn, the white is Ultra White (Point Pleasant), and the gray is  Empire State, all by Dutch Boy. We love Dutch Boy paints. They should hire me to talk about how great I think their paint is. It covers super well and they have some great colors. I’ll be anxious to hear from you, Dutch Boy.

Craft Room Reveal

I finally feel mostly prepared to reveal the finished craft room. 🙂
It’s hard because there are always MORE things that I would like to do to a room and it’s always nice to have a 100% finished product to share.

But, I’m thrilled with how it looks so I’m excited to share it!

P1040529

This is what it looks like as you come in. Dontcha love the stripes? Just always makes me smile. Tutorial if you missed it.

The curtains are lime green. Pretty sure I want to change them to something more neutral, since the rest of the room is so bright. Thoughts?

P1040530

There’s my sewing machine which I kinda/sorta know how to use now thanks to my FABULOUS seamstress mother in law. Not much confidence yet though. I need to start some projects.

And my lamp. One of my first “big” crafty projects. Finally in it’s home in the craft room.

P1040538

I was doing my best to utilize what little light was left of the day.

Here’s the other corner of the room. The hubby’s guitars found a place on the wall (aren’t I generous? hah). So far I’ve done most projects on that tiny little table and the low chair. Wouldn’t it be nice to have an island in the middle of the room? Oooh, and a carpet!
Still, it works. 🙂

P1040535

This is my new favorite part of the house.
My little shelf. Anchored by the dresser underneath. I love having my supplies out in the open and easily accessible there.

P1040524

A little closer up. Buttons, paintbrushes, paintpens, clips…all the essentials. 🙂

P1040541

Several paper flowers that I’ve made. Including the ones on the wall.
What? You want them? Need them? Have to have some??
Check out the etsy shop.

P1040540

This was a project that I was suuper happy with the result. It used to be a magnetic, dry-erase calendar, but I hated having to write in all the numbers every month. (Super lazy. I know.) So I painted it with chalkboard paint from Walmart, handpainted the “to create”, and now I have a magnet, chalkboard, inspiration board.

That’s my Grandma Evelyn. She was super creative. She’s there to inspire.

P1040539

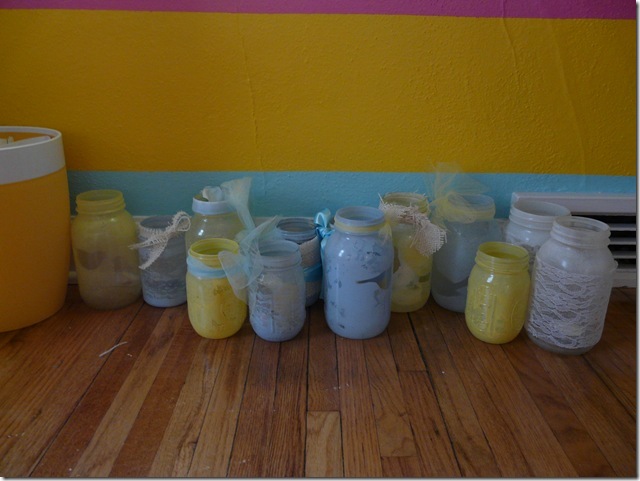
And, just in case you didn’t notice them. Yes, those are several spraypainted mason jars (from a friend’s recent wedding that she was looking to get rid of…yes please!) that are waiting for a repurpose.

P1040532

And my favorite new artwork with happened to be a Christmas present. 🙂 What’s funny is that we both made each other art on a canvas for Christmas.
Funny.

So thanks for stopping by. Hope you enjoyed it.

Partaying it up.


Photobucket

Home Stories A2Z

Room Reveal: Painted Craft Room

This looks to be a long post. After all, it’s a step by step of a never-ending project. But I’ll do my best to not bore you.
Let’s jump right in at the before, shall we?

Green walls (sage maybe?), matching green ceiling, yellow-ed doors and molding from the “lead paint guys”, and a variety of other unsightly obstacles to overcome.

First things first, we got some generic white ceiling paint and got to painting.
**May I interject that painting a ceiling is not fun work, seeing as your hands are above your head the whole time and all. I owed the mister a backrub or two since he did most of it.**
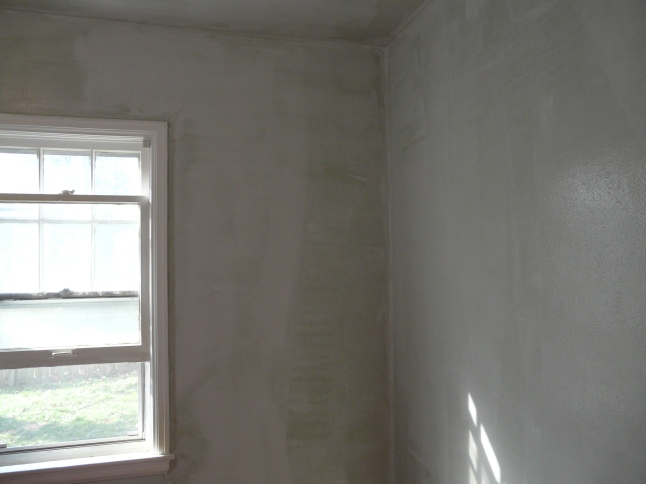
We even “primed” the walls with the ceiling paint. 🙂
In retrospect, we probably should have just used primer. But I HATE priming walls and all our paint was “self-priming”. Yeah, sure it was.

Next, we painted the trim, molding, and doors white. (Like our paint sheet?)
FINALLY, we could begin.

And by begin..I don’t mean painting (color) which is my favorite and probably only enjoying part of the process. We began measuring and taping.

(No..we didn’t measure the whole room with a McDonalds 6 inch ruler. Why am I measuring? Well, the first time around we measured around the WHOLE room and made pencil marks and then taped. The we learned our lesson.)

We measured (with a tape measure!) our walls which were 93 inches from molding to ceiling. I wanted around 9 inch thick stripes so the mister did the math on how many would fit and that sort of thing.

We ended up doing three 10 inch thick stripes of each color and one 3 inch stripe at the bottom. We realized it would be much easier to measure 10 inch stripes than 10 1/3 inch stripes to divide the wall evenly.


(Sorry for the blurry darkness. It was mostly the evening hours that we were able to work on this.)

We painted one color at a time since the tape from the previous color would be in the way of the next color. Also, like I pointed out in yesterday’s post, it was better to do it in sections anyway.

After we lifted the tape of the previous color and let it dry completely, we measured and began taping for the next color. The advantage of the second and third stripes was that we could use the one before it as a guide.

For instance, we only had to measure 10 inches above the blue striped to know where the top of the yellow stripe would be. Then we marked that with pencil, snapped a chalk line, and taped.

What really helped to create straight (ish) lines was that we taped with a tiny  bit of the previous color showing. So a teeny, tiny line of blue showed when we taped for the yellow line and it reeeeally helped to ensure straight lines. Also, probably MOST IMPORTANTLY, we made sure the tape was down really, really, really tight so that nothing would seep through.

The yellow stripe took the longest because it needed three coats of paint. I blame the green underneath.

Are you ready??

Again..taken at night so they’re a little dark.

Oh, I almost forgot one of my favorite things about this project! Both the blue and pink paint were “oops” colors that we found at our local hardware store. So they were about $5 each. Wowzas! I knew the colors that I wanted, but was willing to compromise a little on the shade and we were able to find BOTH! The yellow is the same color as our kitchen! 🙂

The blue is Atlantic Dawn by Dutchboy. The yellow is Sunflower by Dutchboy. The pink is Passion Pink by Pittsburgh Paint. The white is Ultra White (Point Pleasant?) by Dutchboy.

So..it’s bright. Maybe a little Dr. Suess-ey.
But I love it and I can’t wait to fill it up and start creating!

Thanks for reading. Hopefully it wasn’t too long. If you have any questions about what we did you can ask in the comments or contact me!

Linking up..

Home Stories A2Z

Photobucket