Nursery Letter Wall

FINALLY!

The letter wall is ON the wall! 🙂 🙂

We were also blessed with a shower this past weekend (more on that later) and so baby girl’s nursery is seeming much more complete!

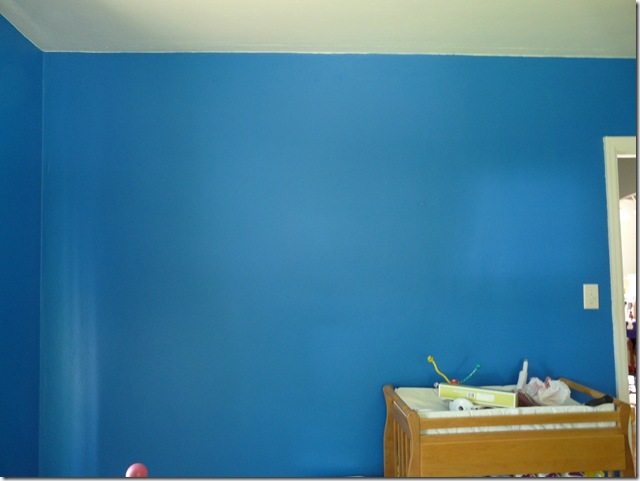
Here’s what we started with:

P1040799

Blue wall. Blank slate.

I had an idea-ish of how I wanted them all placed, but mostly it was a matter of having the (wonderful, amazing, super sweet) hubby hold a letter up to the wall and I would tell him up/down/left/right.

P1040800

Pretty sweet to have such good help.
(Yes, that is a severe farmer’s tan and then scalding burn on his arms. BUT we have a new roof, so I think it was worth it.)

Okay..are you ready????

P1040801

And again!

P1040802

Ok..lemme break it down for you.

P1040803

a – bought from Hobby Lobby, painted the whole thing pink, taped the sides, and then spray painted the whole thing yellow

b – bought from Target as is

c – bought from Hobby Lobby, spray painted orange, and distressed the edges

d – picked up from a ReStore (pretty sure it’s technically a “P”) and wrapped it in ribbon; tutorial here

P1040804

e – made with wood, nails, and yarn; tutorial here

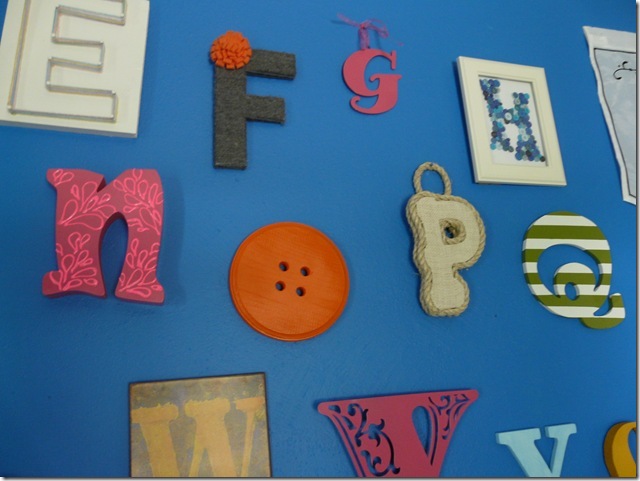
f – wrapped in yarn and pinned on a felt flower; tutorial here

g – gift from a friend (thanks Katie!) and spray painted pink

P1040805

h – made a button monogram and framed it; tutorial here

I – bought flag from Hobby Lobby as is

P1040806

j – bought from Hobby Lobby as is

k – bought from Joann Fabrics (?) and spray painted green

l – made from corks; tutorial here

m – made a fabric covered letter; tutorial here

P1040807

n – bought from Hobby Lobby (originally a “U”), spray painted pink, and then drew a design on with pink puffy paint

o – wooden circle bought from Joann Fabrics, had the hubby drill some holes in it, and painted it orange

p – made a burlap and rope letter; tutorial here

P1040808

q – bought from Hobby Lobby, taped some stripes, and spray painted green

r – made a scrapbook paper covered letter; tutorial here

P1040809

s – bought from Hobby Lobby as is

t – cross from Goodwill spray painted yellow

u – bought from Hobby Lobby and spray painted green

P1040810

v – bought from Hobby Lobby (originally an “A”), sawed off the middle part, and spray painted orange

w – bought from Hobby Lobby as is

x – bought from Hobby Lobby and spray painted pink

P1040811

y – bought from Goodwill and painted blue

& – printed out design, hubby cut with jigsaw, and painted yellow

z – bought from Hobby Lobby, spray painted green, and painted on white design with a paint pen

And one more time just for kicks..

P1040812

I am SO happy that it’s done. Baby Peanut’s nursery is really starting to feel like a room now, and an adorable room at that.

I can’t wait till it’s all done and I can do a great big dramatic reveal for you. 😉

The 36th AVENUE

Fabric Covered Letter M

The letter wall is aaaaalmost all put together and ready to be hung on the wall.

I can’t wait to put it up and ACCOMPLISH something else for Peanut’s nursery.
If “nesting” means wanting to have the nursery done ASAP,
then I am officially nesting. ; )

In other news on the baby front, baby girl is moving constantly in my tummy. I’m not sure if she’s doing somersaults or practicing tae kwan do or what,
but she is a shaker and a mover.

But, on to the point of this post…
I finished up letter M this weekend for the letter wall.

P1040755

Found this tutorial to be super helpful, so if you want a step my step, go check it out.

I started with a cardboard letter from Hobby Lobby and some leftover yellow fabric from my first attempt at making fabric bracelets.

P1040745

I cut a rough outline of my letter leaving plenty of space to wrap around the sides. Thankfully, “M” is reversible and I learned a few things on the first side so that I could improve the second time around.

P1040746

Because it’s tricky to know exactly where the inside points are going to end up, I recommend just cutting a square big enough to cover the whole letter and then cutting out the trickier inside parts as you go.

P1040747

I hot glued one side down on my letter and then started adding my filler.

P1040748

Yup, it’s filling from that pillow I cut up for my owls. hehe.
Tack it down as you go (with hot glue) and focus on one part/leg of the letter at a time.

P1040749

This side was a little bunched and bulgy, so I determined this was the back side.

P1040751

Do the same thing for the front and don’t worry about how messy the sides look, we’ll get to those.

P1040752

For the sides, but some thick paper (I used cardstock) the width of the side of the letter (mine was an inch). It’s okay if you don’t have a piece long enough to cover the whole letter, just make sure that you pay attention to where your seems will be.

P1040753

Cut your fabric a little wider than your strips and fold it around securing it down. I used fabric glue since the tutorial I followed recommended not using hot glue. I’m not sure why. Do I think hot glue would work? Absolutely. Is the chances of you burning yourself very high? Abso-freakin-lutely. So, the choice is up to you.

P1040754

Then, you just hot glue the strips to the side of your letter, and you’re done!
I had my strips meet in the middle of the inside parts so the seam wouldn’t be so noticeable, and made small strips for the bottom “feet” of my letter.

P1040755

Letter M, prepare to meet your alphabet.

Thanks for reading!